Category Archives: How-To

I am a huge fan of really good coffee. But I live 10 miles from a Starbucks, and I’m too frugal to pay Starbucks prices for my daily cups of joe. I had seen Pueblo’s local Solar Roast Coffee guys offer samples of their brewed coffee in SamsClub using a pour-over method, so I knew that a really good cup of coffee didn’t require huge sophisticated equipment. So I decided to knock off one of my New Year’s resolutions: learn to make a really good cup of coffee.

I drink decaf coffee and have been buying relatively good beans for a long time and grinding a week’s supply in a good quality burr grinder. Good decaf beans that are affordable are hard to source, and I wanted a regular supply to appear magically in my mailbox every month. So I set up a Subscribe & Save order with Amazon for 2 lb of San Francisco Bay decaf espresso roast coffee.

But that didn’t yield a really good cup of coffee using my trusty Mr. Coffee 4-cup coffee maker. So I needed to change the way I make coffee in addition to the coffee itself. I needed to brew coffee manually.

I researched different pour-over methods of making coffee, including French Press and Chemex. I already had a French Press from bygone years, and I still couldn’t get a good-tasting, non-gritty cup of coffee from it. Chemex machines were expensive, even the knock-offs. One of the comments in a Chemex review suggested that all I needed was a porcelain dripper and an understanding of the v60 brewing method.

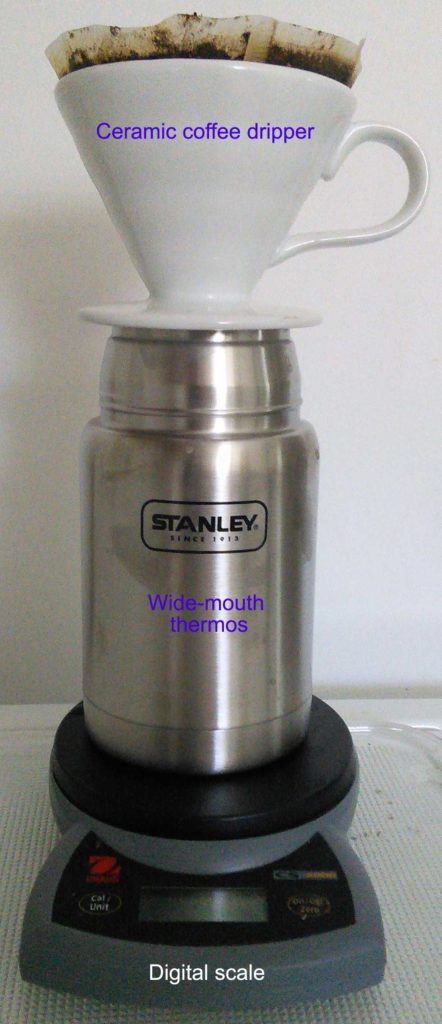
I now have a perfect set-up and am producing 3 cups of rich, mellow coffee every morning without much more work and in about the same time it took the automatic coffee maker. Here are the ingredients:

I am adjusting the method described in the v60 Pourover Brew Guide to suit my preferred coffee strength. The whole process takes only 4 minutes. Here is my method:

  1. Put the electric teapot on to boil.
  2. Grind the coffee—just enough for one batch.
  3. Pre-warm the thermos with hot water from the tap.
  4. Insert a filter into the porcelain dripper.
  5. Use the water from the thermos to pre-wet the filter.
  6. Place the dripper over the wide-mouth thermos. The thermos will keep the brewed coffee hot all morning.
  7. Put the dripper and thermos on the scale.
  8. Add the ground coffee to the filter.
  9. Tare the scale to zero.
  10. Pour about 100 g of just-off-the-boil water over the coffee in the filter and wait 30 seconds to allow the coffee to “bloom.”
  11. Pour the rest of the water into the filter, in 100-g batches, using a steady circling motion.
  12. After all of the coffee has dripped through (it takes about 3 minutes), remove the porcelain dripper, pour your first cup, and cap the thermos.

Excel Pastel Color Palette

I can’t tell you how many times I’ve changed the default colors in the Excel color palette to more subtle, pastel shades. And then I do it again a couple months later. And then again.

Today, when I once again yearned for a way to import pastel colors from a convenient template found somewhere on the Interworld, I realized that no such template exists.

I must be either the only person in the world who would want a pastel color palette in Excel or the only person in the world who is willing to take the tedious time to create one and then share it.

Here you go.

Excel Pastel Color Palette with RGB Values Excel_Pastel_Color_Palette

To import this palette into your Excel program (I’m using the old Excel 2003, so you may need to adapt these steps to your application),

  1. Open the file you just downloaded, “Excel_Pastel_Color_Palette.xls.”
  2. Open the Excel workbook that you want to import the color palette into.
  3. On the Excel menu, select Tools->Options.
  4. In the drop-down box under Copy colors from, select the pastel color palette file name.
  5. Click OK.

Enjoy!

Get FREE Lynda.com video tutorials via your local library

lyndadotcomLynda.com is the BEST online tutorial service available. They’ve been around since 1995 and offer outstanding video tutorials on software, creative, and business skills. A couple years ago I gave up my monthly subscription to Lynda.com because although it was worth it, I just didn’t have time to view the tutorials and didn’t want to waste my money. A few months ago I had more free time and was searching around for video tutorials and discovered something amazing…

NOW you can get a FREE Lynda.com subscription via your local library. The Pueblo Library is not very large so I was absolutely amazed that it subscribes to Lynda.com. What a tremendous service! If you have a Pueblo library card, you are automatically eligible to use Lynda.com.

To get started (and probably the easiest way to learn if your library offers this) is to type the following URL into your browser and replace “your librarys URL” with your library’s URL:

http://lynda.com/portal/sip?org=your librarys URL

For instance, Pueblo access is at http://lynda.com/portal/sip?org=pueblolibrary.org

Colorado Springs access is at http://lynda.com/portal/sip?org=ppld.org

I can’t say enough good stuff about Lynda.com. They’ve helped me develop my business skills, learn new software programs, learn Web design (right now I’m learning how to master WordPress). Whenever my business is a little slow, I fill the time watching Lynda.com video courses. They have over 4,326 of them available.

Want to learn something new? Let your library help you learn from Lynda.com

Behold, I created custom Facebook tabs!

I finally figured out how to customize the tabs on my business’s Facebook business page. This has been a time-consuming process because Facebook fails to behave the way that most of the tutorials say it should. I had a breakthrough today and this was the journey…

This Boostlikes pageHow to Rename Your Tabs on Your Facebook Page” gave me my first clue in a very well-written post. They explained what I could and couldn’t do to customize the tabs. They introduced me to the concept of FB apps and explained that I could customize my tabs by using an app.

Then I watched a great video (I won’t mention all the non-great ones I watched) “How to Add Apps to Your Facebook Fan Page. This video introduced me to Woobox and showed me how to install this app on FB.

Once that was done, it was smooth-sailing. I was able to add the What We Do and Portfolio tabs and get the non-editable tabs out of the way (hidden in the More tab). There is still much for me to work on, but it has been a productive day.
facebook

Home-Made Dryer Sheets

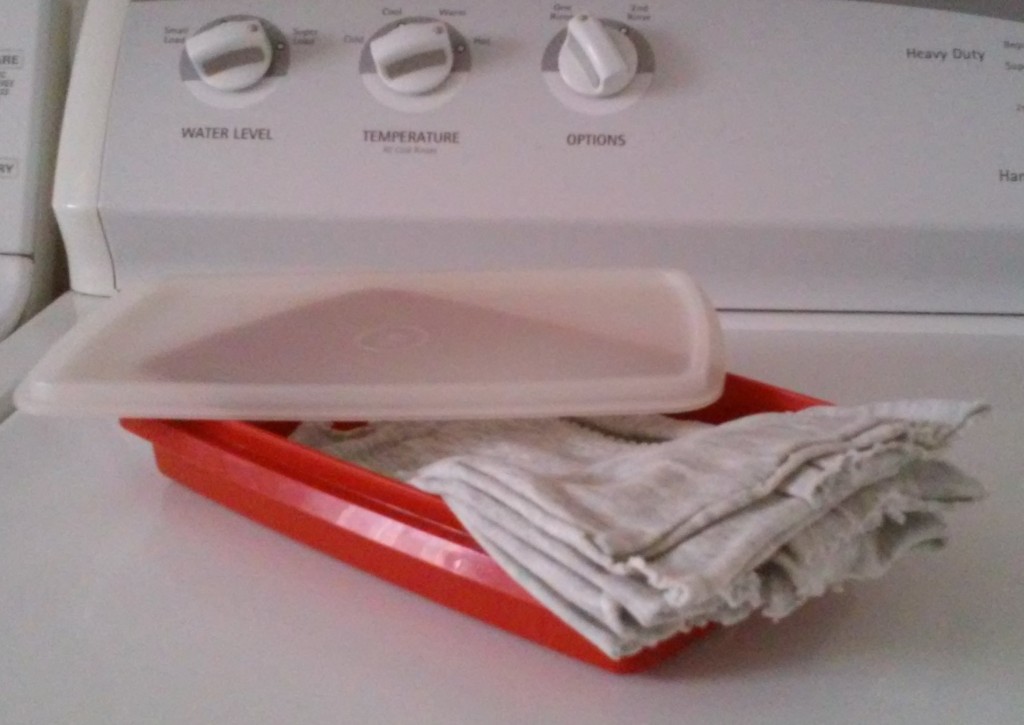
dryer_sheetsI’m always looking for ways to reduce household expenses and eliminate unnecessary chemicals from my life. For the past several months, I’ve been making my own dryer sheets. Goodbye Bounce fabric sheets! These homemade sheets are so easy to make and totally sustainable—use them over and over again.

  1. Locate a tight-sealing plastic container about 6 in. x 9 in. (but size really doesn’t matter). I use a RubberMaid one. A baby-wipes container works, too.
  2. Cut up an old-t-shirt or other scrap fabric into rectangles that, when  folded in half or in thirds, will stack neatly in the plastic container. I cut mine 9 in. x 9 in. with pinking shears to reduce edge fraying.
  3. In a measuring cup, mix 1/2 cup of white vinegar and 15-20 drops of your favorite essential oil. I tried orange oil first but it didn’t smell very strong. I next tried lavender essential oil and I like it a lot. You can try grapefruit seed or tea tree oil as well.
  4. Stack 1/3 of the pieces of cloth in the container. Pour 1/3 of the vinegar mixture over the stacked fabric pieces. Repeat these layers twice with the remaining fabric and vinegar mix. This will evenly saturate the cloth with the vinegar.
  5. Put container lid on securely.

The vinegar will freshen the laundry, combat static cling (but not entirely win), and soften the cloth. The essential oils will make everything smell good and some oils will kill any bacteria and germs found in the laundry. The clothes stay surprisingly moist in the sealed container. I stack the used clothes on a shelf above the washing machine and repeat the process when the ones in the container are all used.

Easy Way to Take Corn Off the Cob

corn_cutting

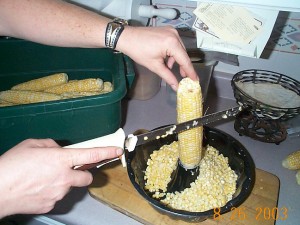
I’ve tried every gizmo on the market to get corn off the cob prior to freezing. Most leave great chunks of my knuckle mixed in with the corn.

Here is an absolutely slick way to tackle this labor-intensive job. You will need two tools: a bundt cake pan and an electric knife.


  1. Anchor the ear of corn in the open end of the bundt pan’s inner pinnacle.
  2. Using the electric knife, make five or six cuts down the sides of the ear. Keep as close to the cob as you can to get the whole kernel.
  3. As you cut, the kernels fall into the bundt pan. Rotate the bundt pan as you cut to distribute the kernels and maximize the space between emptying.

Last fall, I shucked, de-kerneled, and bagged 7 dozen ears of corn in less than 2 hours!

Quick and Easy Fermented Dill Pickles

Homemade Dill Pickles

OMG, these pickles are deleeeshious! And so easy. It will take you 10 minutes. Contrary to popular opinion, these pickles can be made using regular cucumbers rather than having to buy pickling cuckes. Yes, the skins are thicker, but they taste just great. I love this recipe because it makes 1 quart and 1 pint at a time. So when I have four cucumbers from the garden, I just cut and squeeze them into a jar, pour over the brining liquid, shake the jar a couple times a day, and 10 days layer I have exquisite dill pickles. Give them a try. This is a particularly good recipe to introduce you to fermented foods. You’ll get hooked, I promise.

Lacto-Fermented Garlic Dill Pickles

Makes 1 quart

Main Ingredients:

• 5-6 medium pickling cucumbers (about 1 lb) – look for firm, unblemished, bumpy ones
• 2 garlic cloves, chopped coarsely
• 1 sprig thyme
• 1 sprig oregano
• 1 bay leaf
• 1 small bunch of dill
• 3-4 small grapevine leaves (optional, but keeps the pickles crisp)

Brine Ingredients:

• 2 tsp coriander seeds
• 1-2 tsp turmeric powder
• 1 tsp fennel seeds
• 1/2 tsp red pepper flakes
• 1-2 TB sea salt (I prefer a rounded tablespoon)
• 1-1/2 cups filtered water
• 1/2 cup raw, unfiltered cider vinegar

Instructions:

1. Wash the cucumbers, but don’t scrub them (you want to leave some lactobacillus bacteria on them) and rub off any spines.

2. Trim about 1/8 inch off the blossom end of the cucumbers. This removes an enzyme that can make your pickles limp. I also cut the cucumbers into halves or quarters so they fit together better in the jar.

3. Put the other Main Ingredients in a 1 quart largemouth canning jar and then pack cucumbers in as tightly as possible (try not to bruise them in the process).

4. Mix the brine ingredients together in a bowl and then pour the mixture into the jar to cover the cucumbers completely, leaving about 1/2 inch headspace.

5. Cover with a canning jar lid and band, write the date or day on the jar (a Sharpie works), place the jar in a bowl (to catch any overflow or leakage on the days the jar is inverted) and once a day, for a week, flip the jar over to redistribute the spices that will tend to settle to the bottom.

6. After a week, keep the jar in the refrigerated. Enjoy!

The original recipe said these would keep for a month in the refrigerator, but I have some that are several months old and they are just as crispy and delicious as they started out. Remember that with fermented vegetables, if they look or smell bad or appear slimy, don’t eat them!

(Photo and recipe from http://www.motherearthnews.com/real-food/pickling/quick-and-easy-fermented-dill-pickles-zbcz1508.aspx. They adapted the recipe from A Platter of Figs, David Tannis)

Beautiful Live Wallpapers for your Mobile Devices

Northern Lights FREE (Aurora) - screenshot thumbnail

I enjoy looking at my tablets and phone even when I’m not using them. The reason is they use a live wallpaper that constantly changes. My very favorite live wallpaper is Northern Lights.

I’m a northern lights fan and this wallpaper is stunning and also soothing with its gentle transitions of the aurora, twinkling stars, and an occasional shooting star.


I really liked these, too:
Cover art
Mystic Night Live Wallpaper

Cover art
Rains Live Wallpaper

Cover art
Space Galaxy Live Wallpaper

Cover art
Sunrise Live Wallpaper

Netvibes Dashboard Example

When Google shut down its iGoogle RSS reader in 2014, I searched for replacement options. After trying several, I settled on Netvibes.com and have been very happy with it. It can pull feeds from any available blogs or Web sites, but the big selling points are the available widgets and the extensive customization I can do. Widgets, like weather, news, and (most importantly) photos of cats, turn this dashboard into a visually pleasing landing page. Plus I can make as many separate pages as necessary on my dashboard (e.g., one for finances or games). Here is a screen capture of my Netvibes dashboard (click to enlarge):

Netvibes dashboard screen capture

Canning Tomatoes with a Crock-Pot’s Help

My springtime “I-need-to-plant-something-green” eyes are inevitably bigger than my August “what-the-heck-was-I-thinking-when-I-planted-all-those-freakin’-tomatoes” tummy. Because I preserve a great deal of the meat and vegetables that I grow, I dutifully can all those tomatoes despite the growing number of unused and unneeded jars of canned tomatoes building on my pantry shelves.

This summer was no different except that I planted double the number of tomatoes than usual, thinking that I needed to provide my parents with tomatoes since they no longer grow their own. Well, they moved into a retirement home that provides all meals. To make matters worse, I learned in July that I needed to forgo my usual high-acid diet to help an acid reflux problem. So no more tomato dishes for me.

The tomatoes plants, however, outdid themselves.

My practice is to wash the freshly picked tomatoes and immediately freeze them in gallon zip-lock bags. Then when the weather cools off and I don’t mind heating up the kitchen with pots of boiling liquid, I preserve the harvest for long-term storage. This post describes two ways that I let my crock-pot do the heavy work for me.

Tomato Juice

  1. Dump a gallon bag of frozen tomatoes into a 3.5-quart (or thereabouts) crock-pot. Feel free to add up to 1 cup of other veggies (think V-8), such as celery or a jalapeño pepper.
  2. Cook for 10 to 12 hours.
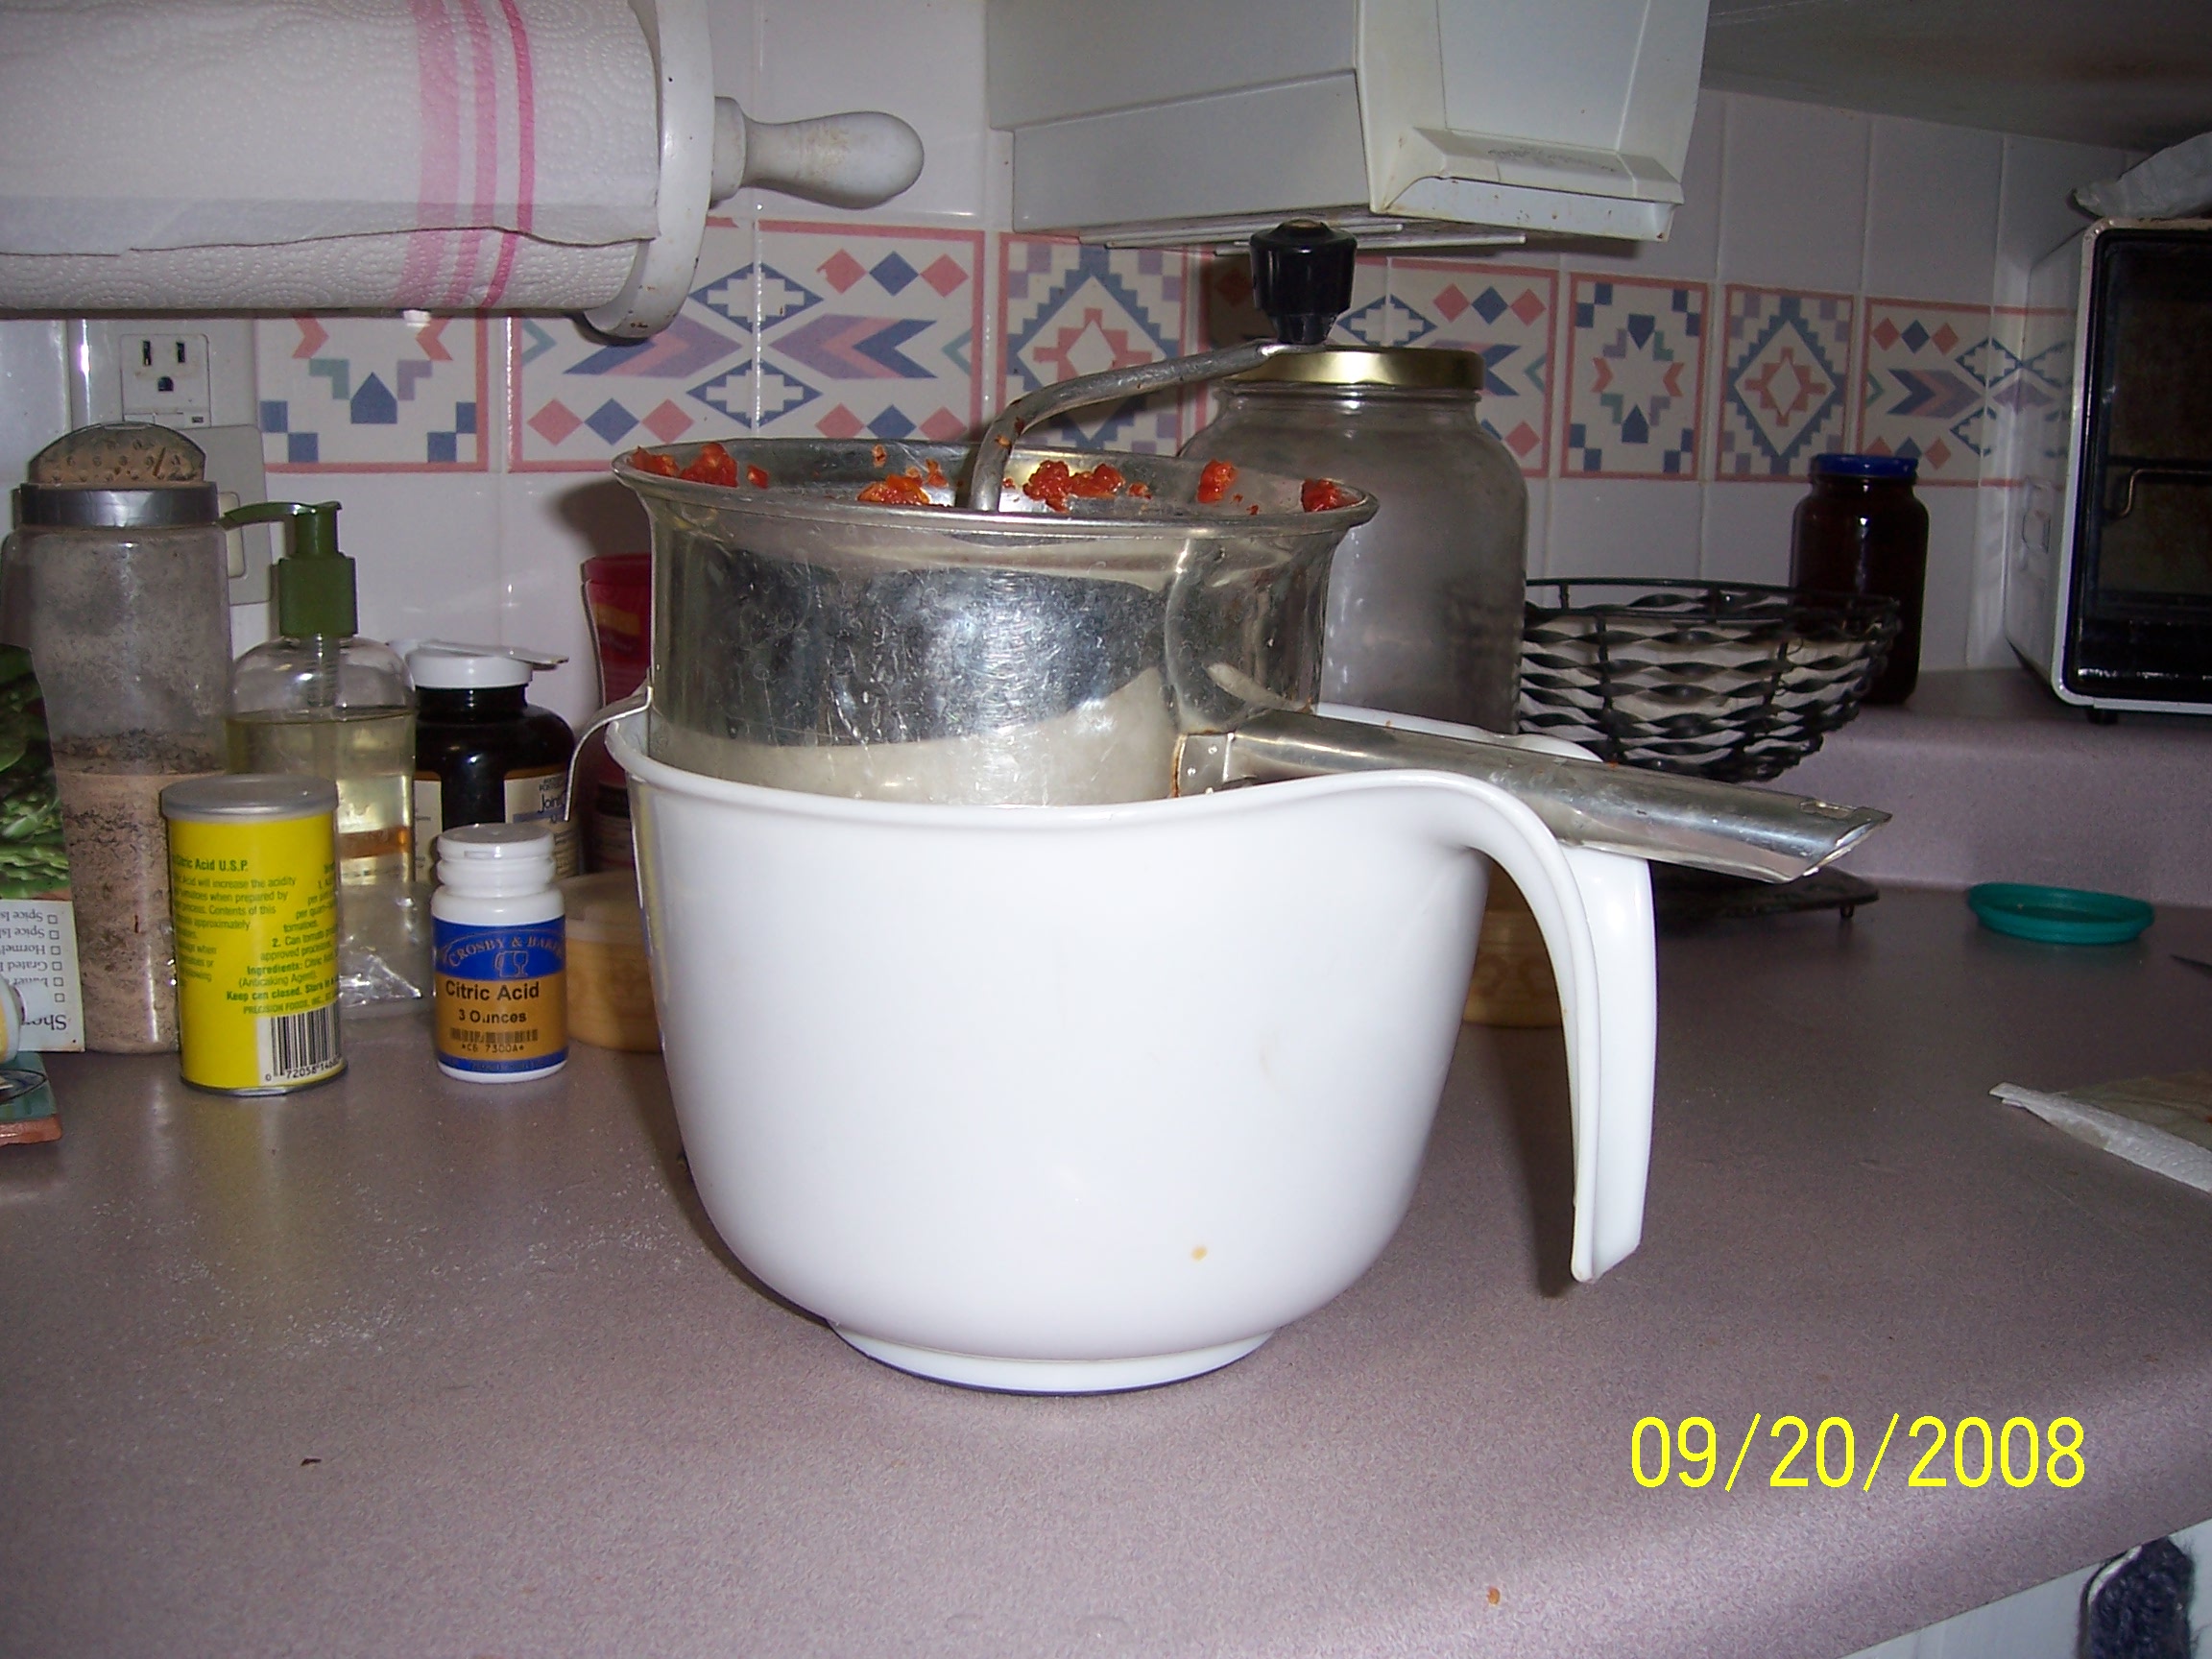
  3. Pour the cooked tomatoes into a food mill that you’ve suspended over a large bowl.
  4. Force as much pulp and liquid as possible through the food mill and into the bowl.

That’s it. You’ll need to shake the juice to mix the pulp and liquid; it naturally separates. Store in the fridge for 10 to 14 days. Makes 1/2 gallon of juice.

Tomato Sauce

The most time-consuming task in making tomato sauce is cooking it down to remove the liquid and thicken the sauce. The crock-pot will do that for you.

  1. Dump a gallon bag of frozen tomatoes into a 3.5-quart (or thereabouts) crock-pot.
  2. Cook for 10 to 12 hours.
  3. Pour the cooked tomatoes into a food mill that you’ve suspended over a large bowl. The liquid will go into the bowl; the tomatoes and pulp will remain in the food mill.100_1331
  4. Dispose of the liquid in the bowl (or save it somewhere to make soup with).
  5. Force as much pulp as possible through the food mill and into the bowl.
  6. Make five more batches of pulp. Store the pulp in the fridge until all batches have been processed. If you can borrow one or two additional crock-pots, it will speed things up a lot.

The pulp in the bowl is the perfect consistency to make tomato sauce, pizza sauce, and spaghetti sauce. We’ll add some basic spices to make a general-purpose tomato sauce. When you open the canned sauce, you can add meat or more spices to suit whatever you are making.

  1. Transfer the pulp to a large cooking pot, preferably a 5-gallon stainless steel one.
  2. Add the following to the pulp in the bowl:
    • 1 cup chopped onion
    • 1 cup chopped green pepper
    • 1/4 cup brown sugar
    • 2 Tbsp basil
    • 2 Tbsp oregano
    • 4 tsp salt
  3. Bring the mixture to a boil, stirring frequently to prevent scorching.
  4. Ladle hot sauce into hot jars, leaving 1″ of headspace.
  5. Wipe the jar rim clean. Place a hot lid and ring on jar and screw down tightly.
    Process pints for 20 minutes and quarts for 25 minutes at 10 lb pressure in a pressure canner.